Day 2 of creating Blogarijonas
Hello everyone, today I spent another few hours on trying to make Blogarijonas more beautiful. On todays menu we will discuss some of the main features of a personal website (menu is on the menu).
Menu implementation
Firstly, today marks the creation of the menu!!! Now everyone (me) can access all of the amazing posts (2 posts) not through Archives but through a Posts menu tab. This was a very easy implementation since everything is pretty much built in. To create a simple menu containing posts, archives, tags and a project tab simply copy this code into the config file (do not forget the indentation)
menu:
  main:
    - identifier: archives
      name: Archives
      url: /archives/
      weight: 3
    - identifier: tags
      name: Tags
      url: /tags/
      weight: 4
    - identifier: posts
      name: Posts
      url: /posts/
      weight: 1
    - identifier: projects
      name: Projects
      url: /projects/
      weight: 2
Shortcodes
Another useful thing I learned are shortcodes. These snipets help writing md files, most importantly adding photos. Compared to regular uploads of photos through md syntax, shortcodes give more options such as caption, alt text, size etc. For this I recommend this very well written blog. This lets you upload pictures in different sizes with different allignment and captions:
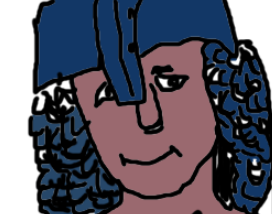
Digital image of me centered. Digital image of me, but smaller, in the left.

Label
Lastly, added a label to the website, now there is a picture of the Thinker next to Blogarijonas title.
These captions are so useful I love shortcodes
Endnote
Now website looks prettier and it has some of the main features of a blog website.